3D printing
Experiments with a 3D printer.

WiP Warning
Motivation
Components
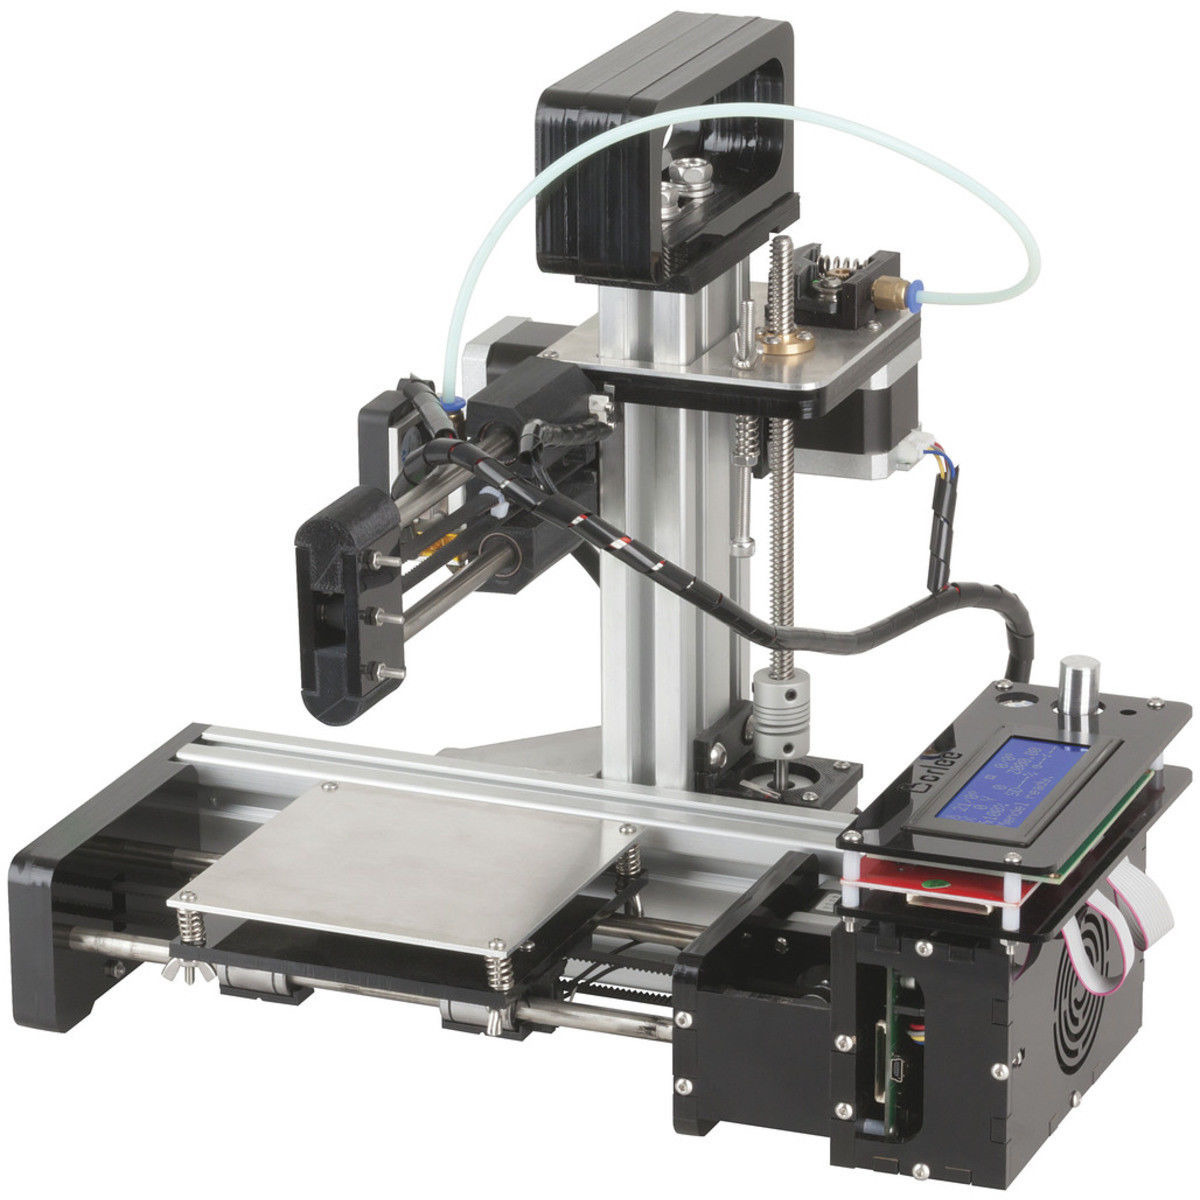
 | Duinotech TL4076 | Jaycar | The TL4076 'mini 3D printer' from Jaycar |
The printer
This is not a review of the Jaycar TL4096 printer, but my impressions are: This is a good starter 3D printer at $AU299.00. There is however one issue which became quickly apparent:
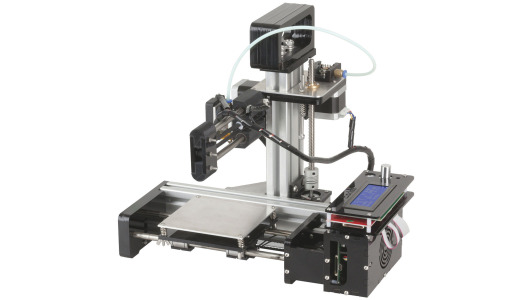
- The vertical bar is not well fastened to the horizontal bar, and it wobbles.
Tightening up the bolts doesn't help - the fastener is just not designed that well.
It needs three fastening points - not two.
This is a serious design oversight, which will hopefully solved in a future version of this printer.
Setting up slic3r
slic3r can get its configuration from the TL4076.ini file provided on the SD card with the printer, by invoking it with the --load TL4076.ini option.
Software process
Models can be produced in openscad.
Model should be 'rendered (F6)', then exported as .stl eg myfile.stl.
slic3r --load TL4076.ini --print-center 45,45 myfile.stl will create myfile.gcode.
the --print-center 45,45 centres the model on the (rather small 90mm*90mm) bed. For some reason the default is 100,100 even if the .ini file specifies a 90mm*900mm bed. Go figure.
myfile.gcode can be copied into the SD card, which can be inserted into the printer.
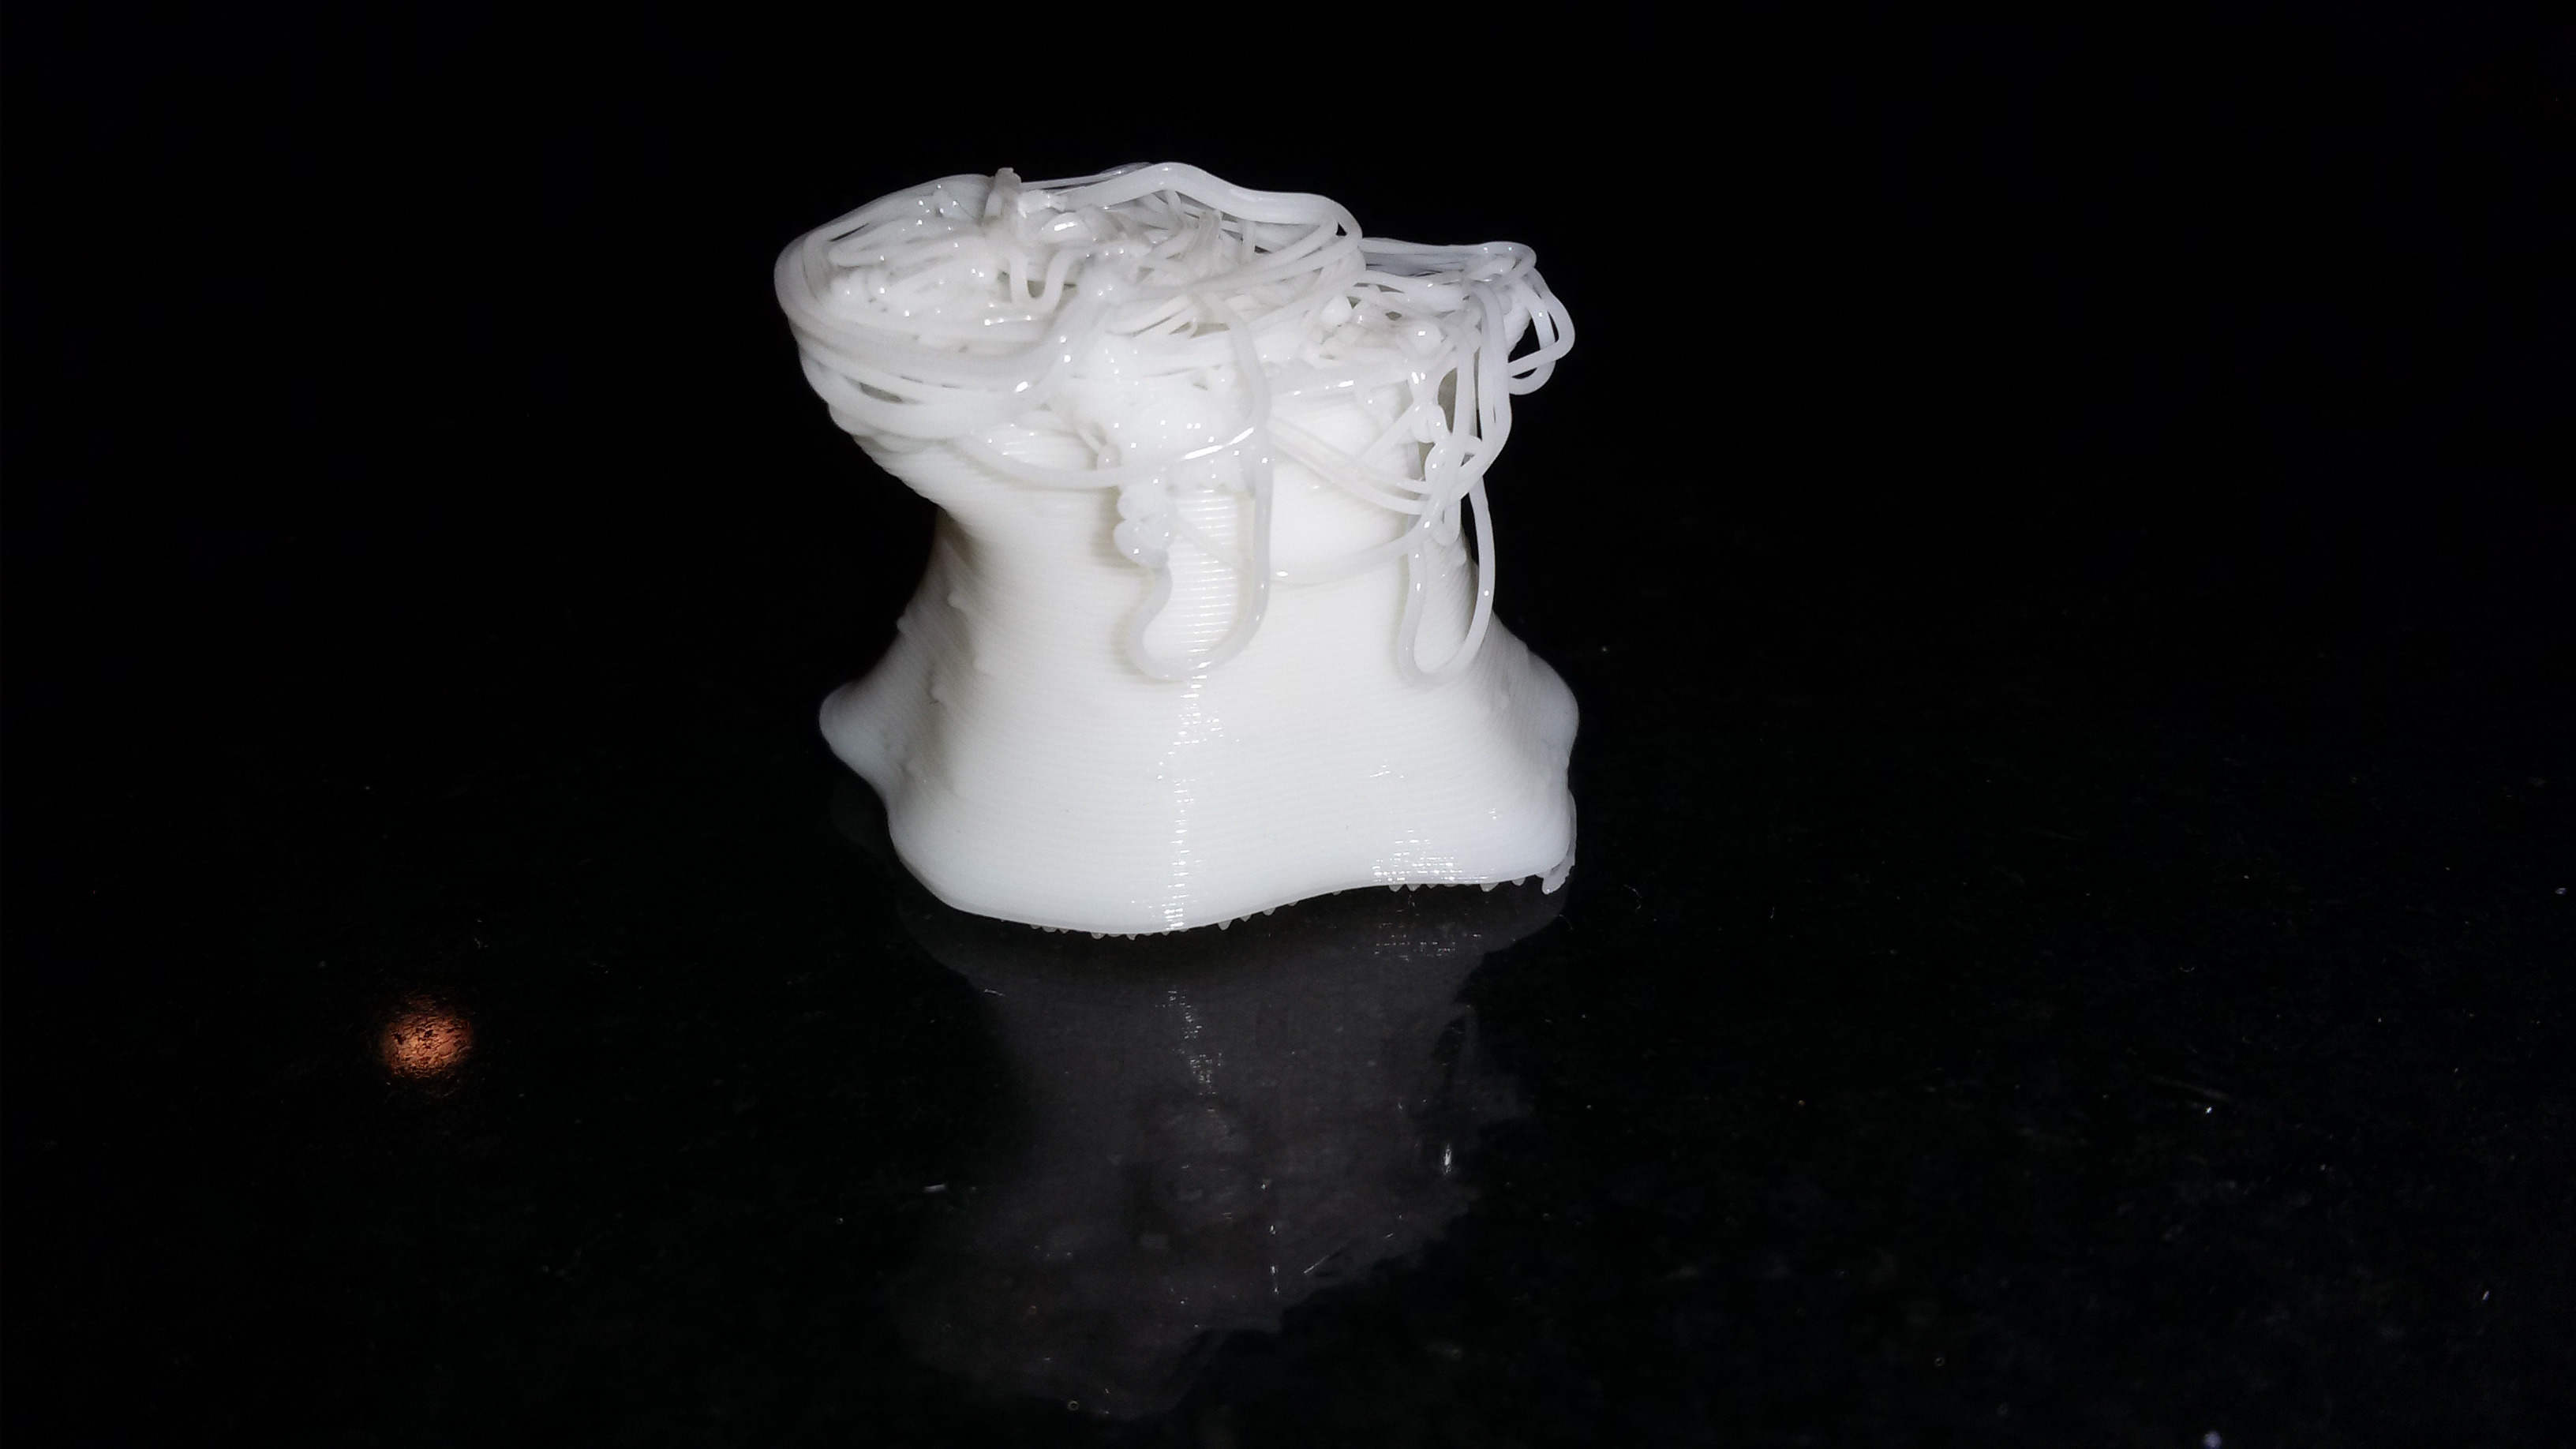
First attempt
The mini-ghost is a .gode file which comes with the printer to get started. What went wrong? The Z-calibration was wrong, the printer started printing the bottom of the ghost too high, and was just flicking around melted plastic. Eventually it took, but didn't actually attach to the bed well, and around halfway, the base of the ghost moved. Goo prevailed.
Second attempt
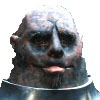
The Z calibration was re-done, and ghost revisited the result wasn't bad. The sides are clean - though the top of the head didn't come out that well. This is probably because the previous layers didn't have time to cool towards the tip. The guy in Jaycar warned me about this - apparently you can slow down the last few layers in case the model comes to a tip.
Third attempt
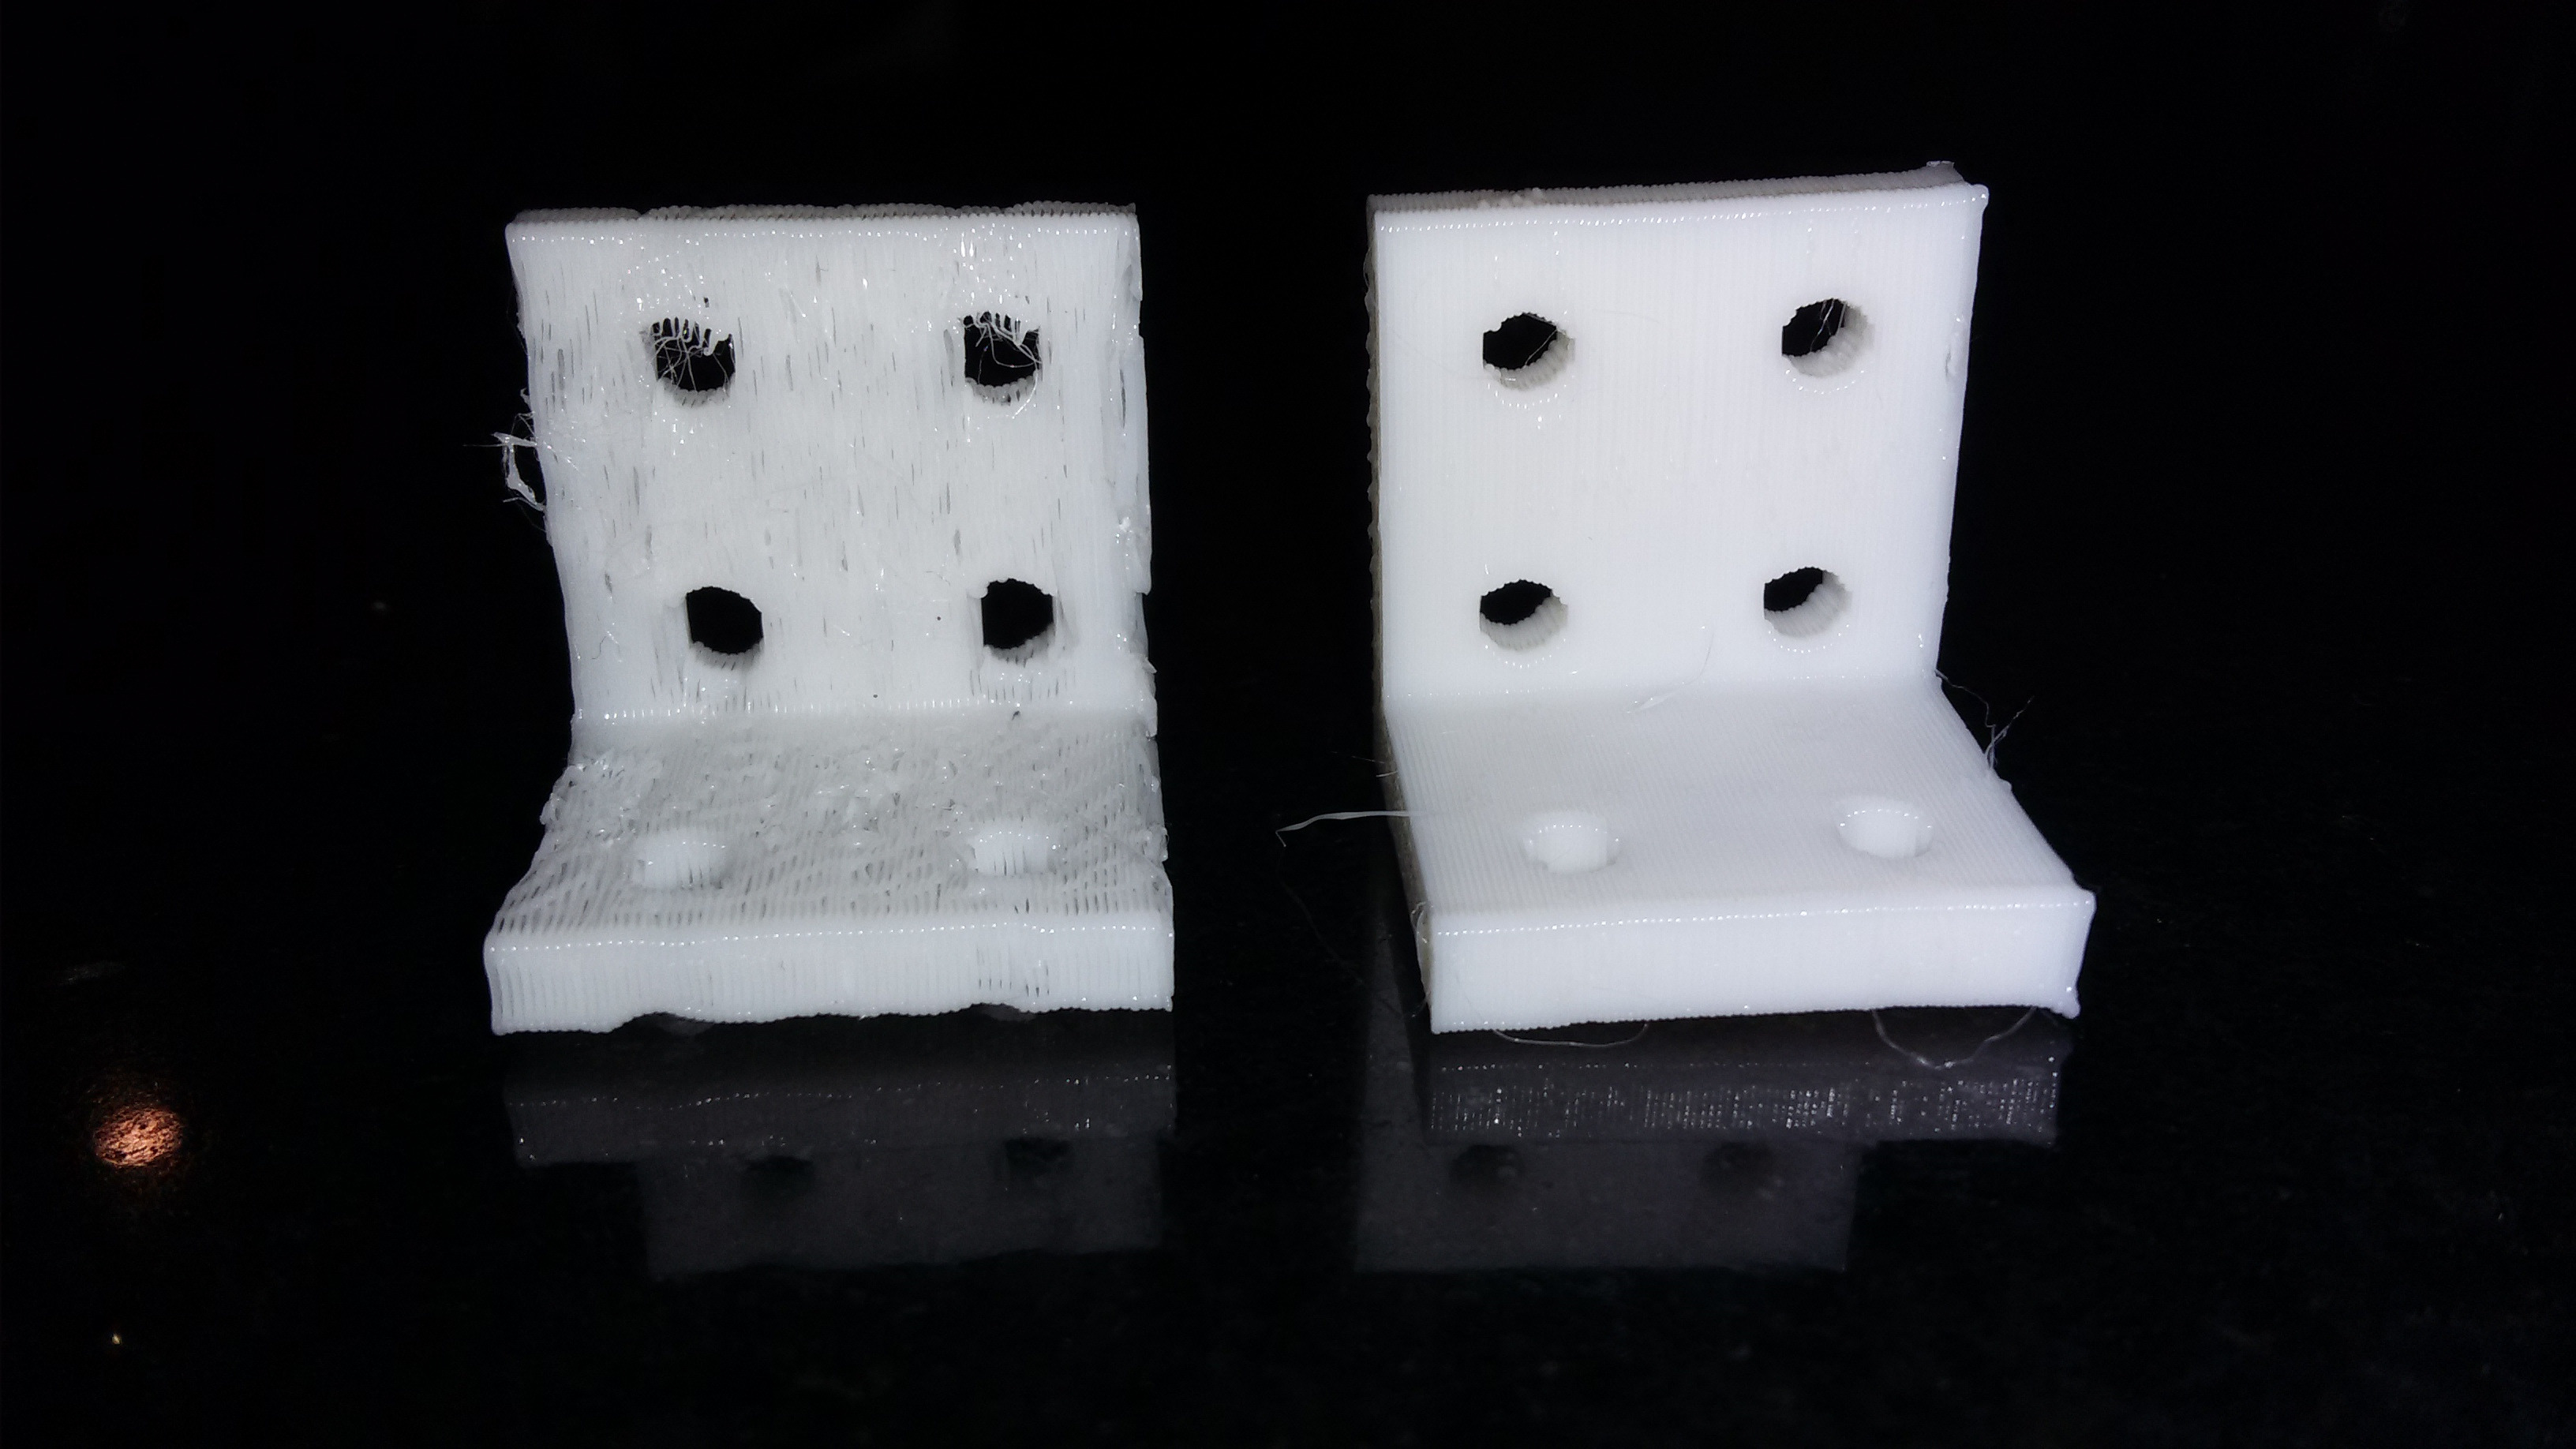
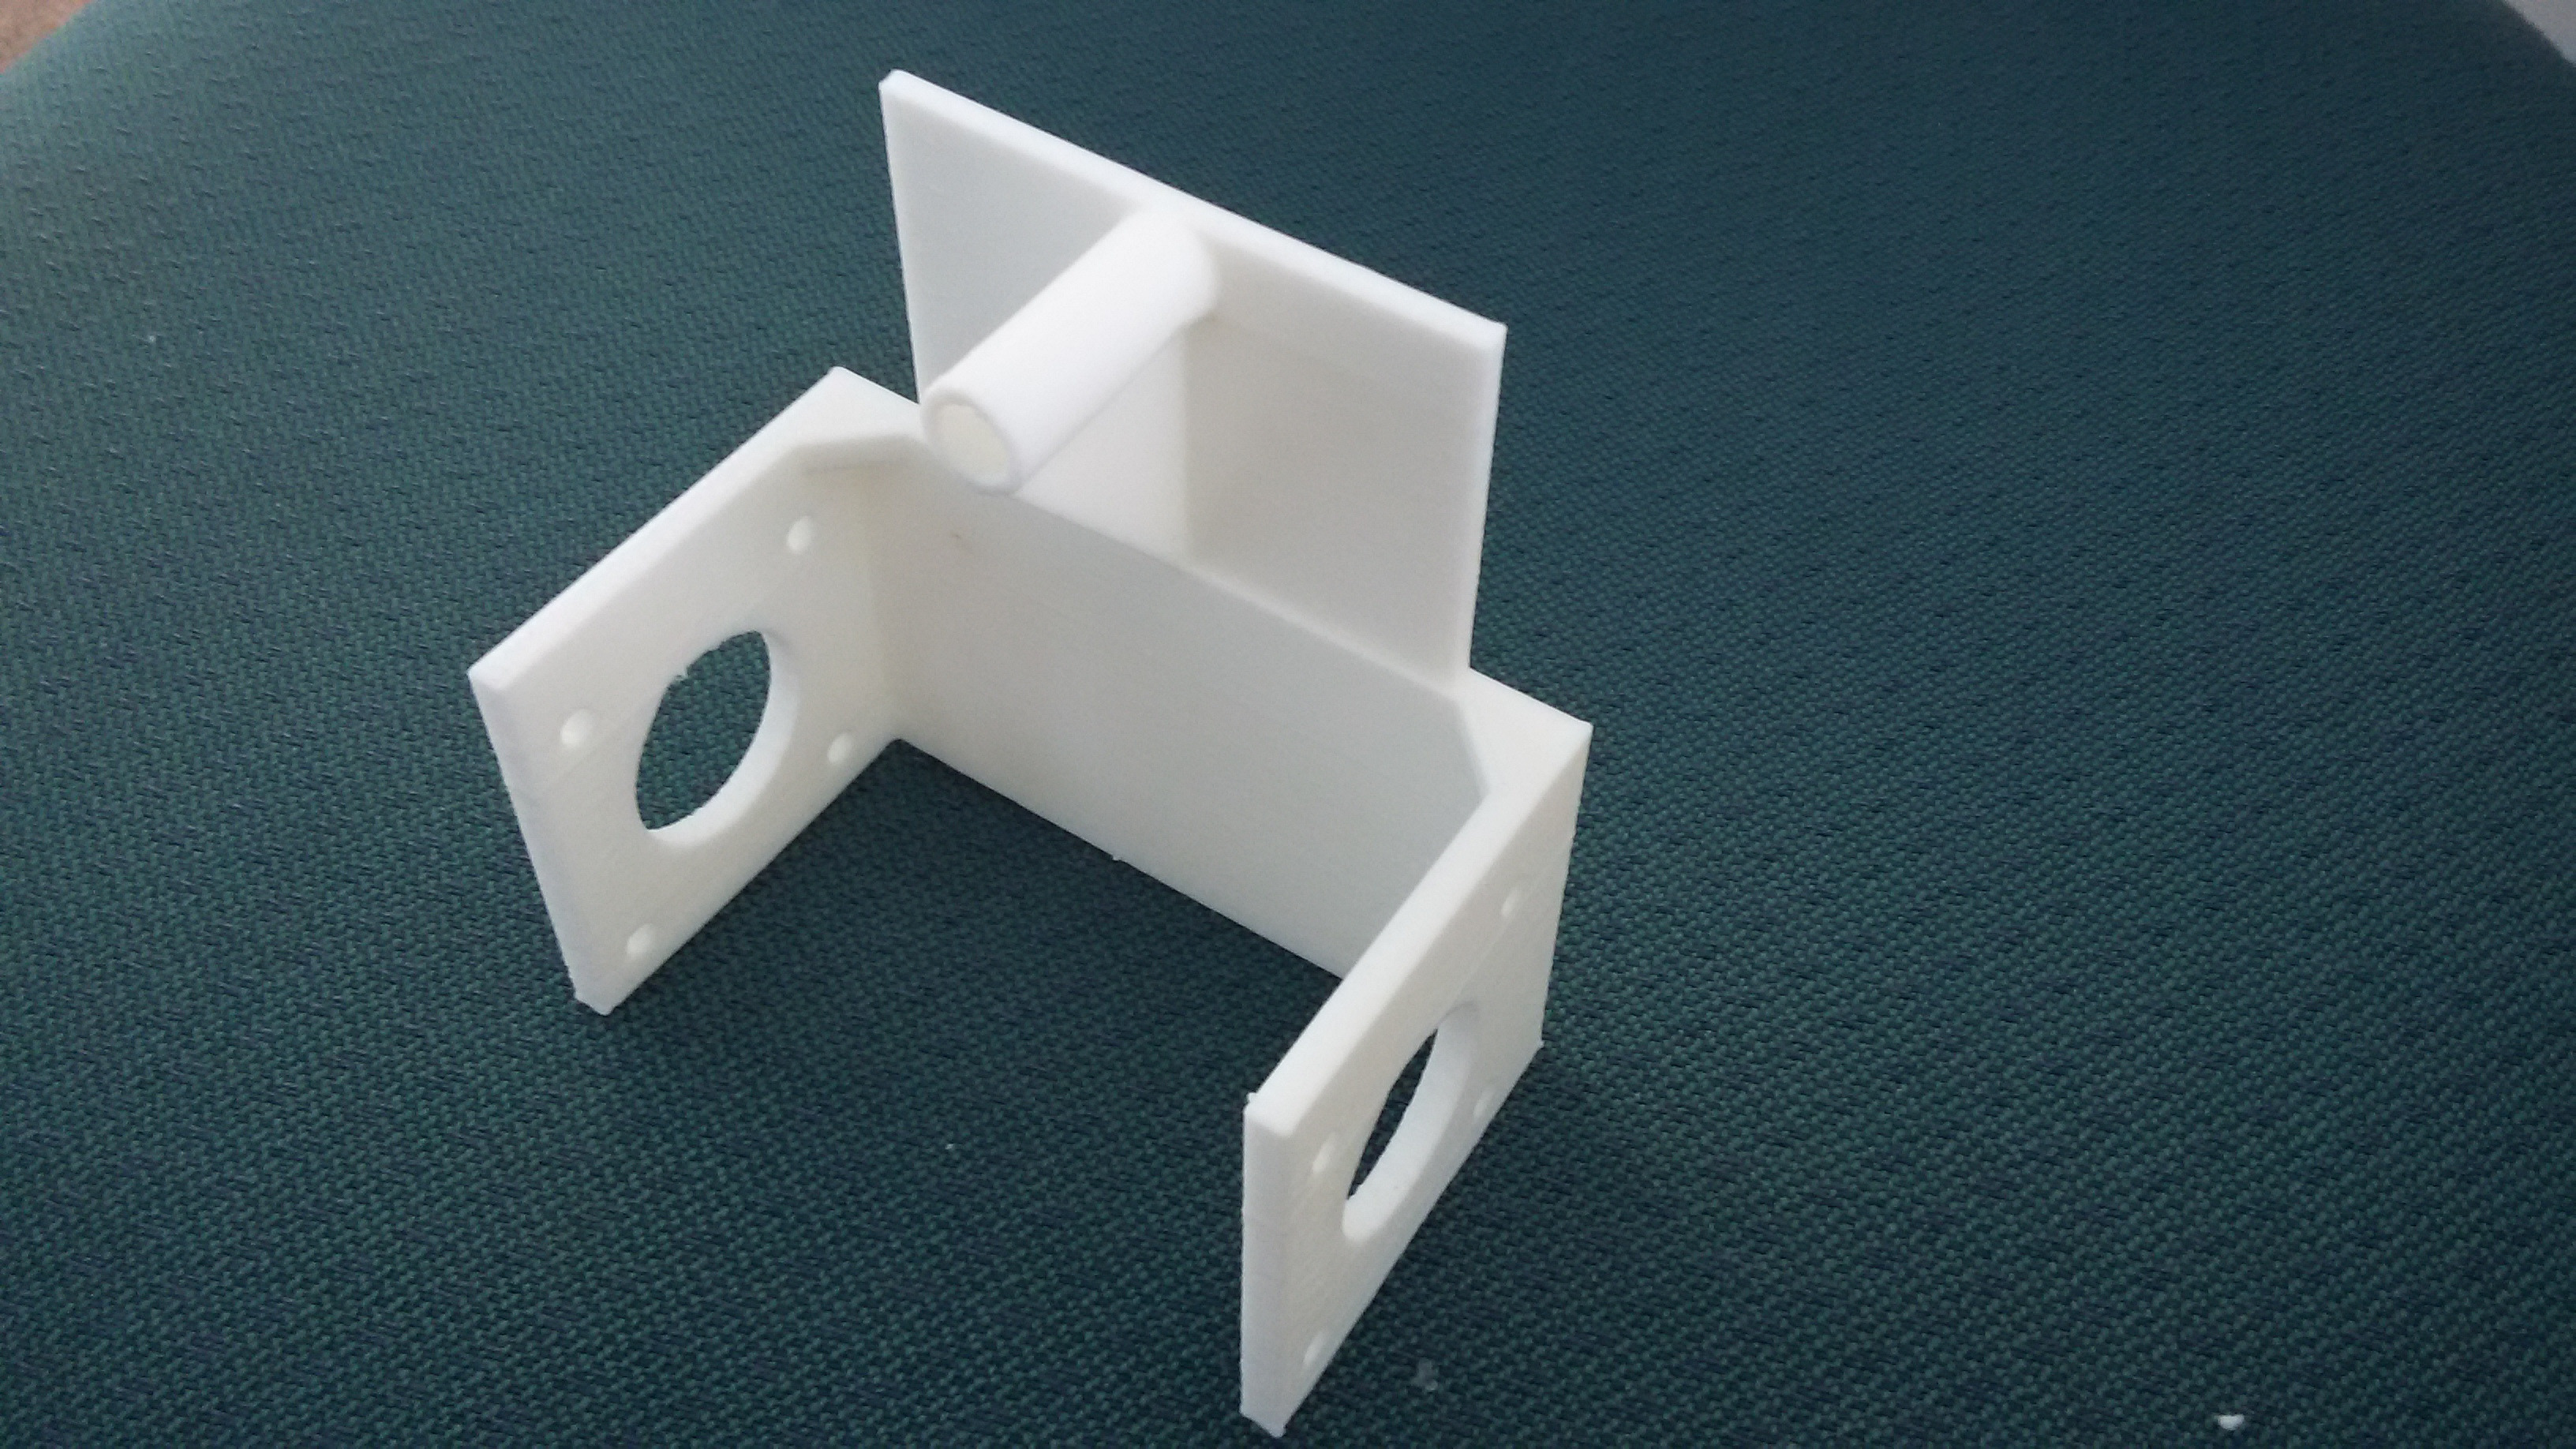
This is a small bracket designed in openscad and printed. It is not designed to be pretty, but functional.
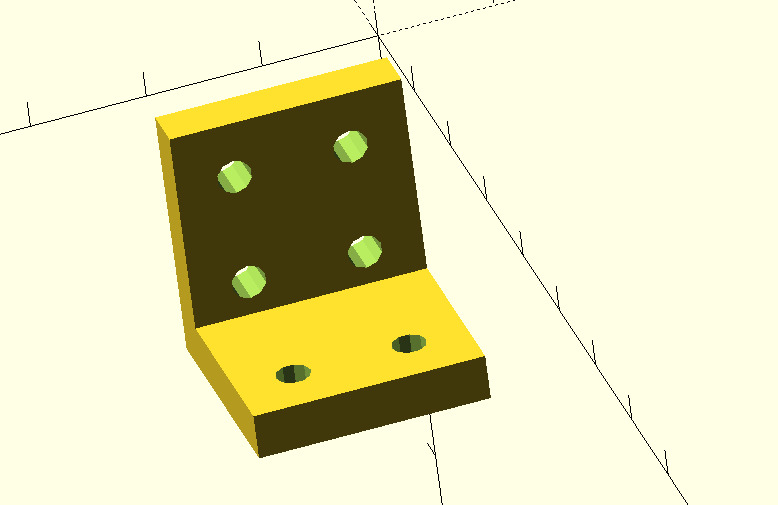 The left bracket was an attempt was run by guessing what slic3r parameters to use for the printer - and clearly not guessing that well.
Having said that, while this looks like a gooey mess (the parameters need some serious tightening up), it is actually quite strong. It would hold a small robot together quite well. The dimensions are accurate, and the warping minimal.
It also has a small amount of flexibility, (enough that it is not brittle) but not too much. (Note that it has been printed lying sideways to give it maximum strength - if it were printed any other way, it would come apart with minimal force).
For the right bracket, the .gcode was created with
The left bracket was an attempt was run by guessing what slic3r parameters to use for the printer - and clearly not guessing that well.
Having said that, while this looks like a gooey mess (the parameters need some serious tightening up), it is actually quite strong. It would hold a small robot together quite well. The dimensions are accurate, and the warping minimal.
It also has a small amount of flexibility, (enough that it is not brittle) but not too much. (Note that it has been printed lying sideways to give it maximum strength - if it were printed any other way, it would come apart with minimal force).
For the right bracket, the .gcode was created with slic3r --load TL4096 myfile.stl, which printed much more slowly and used more filament, but came out much cleaner.
Something useful
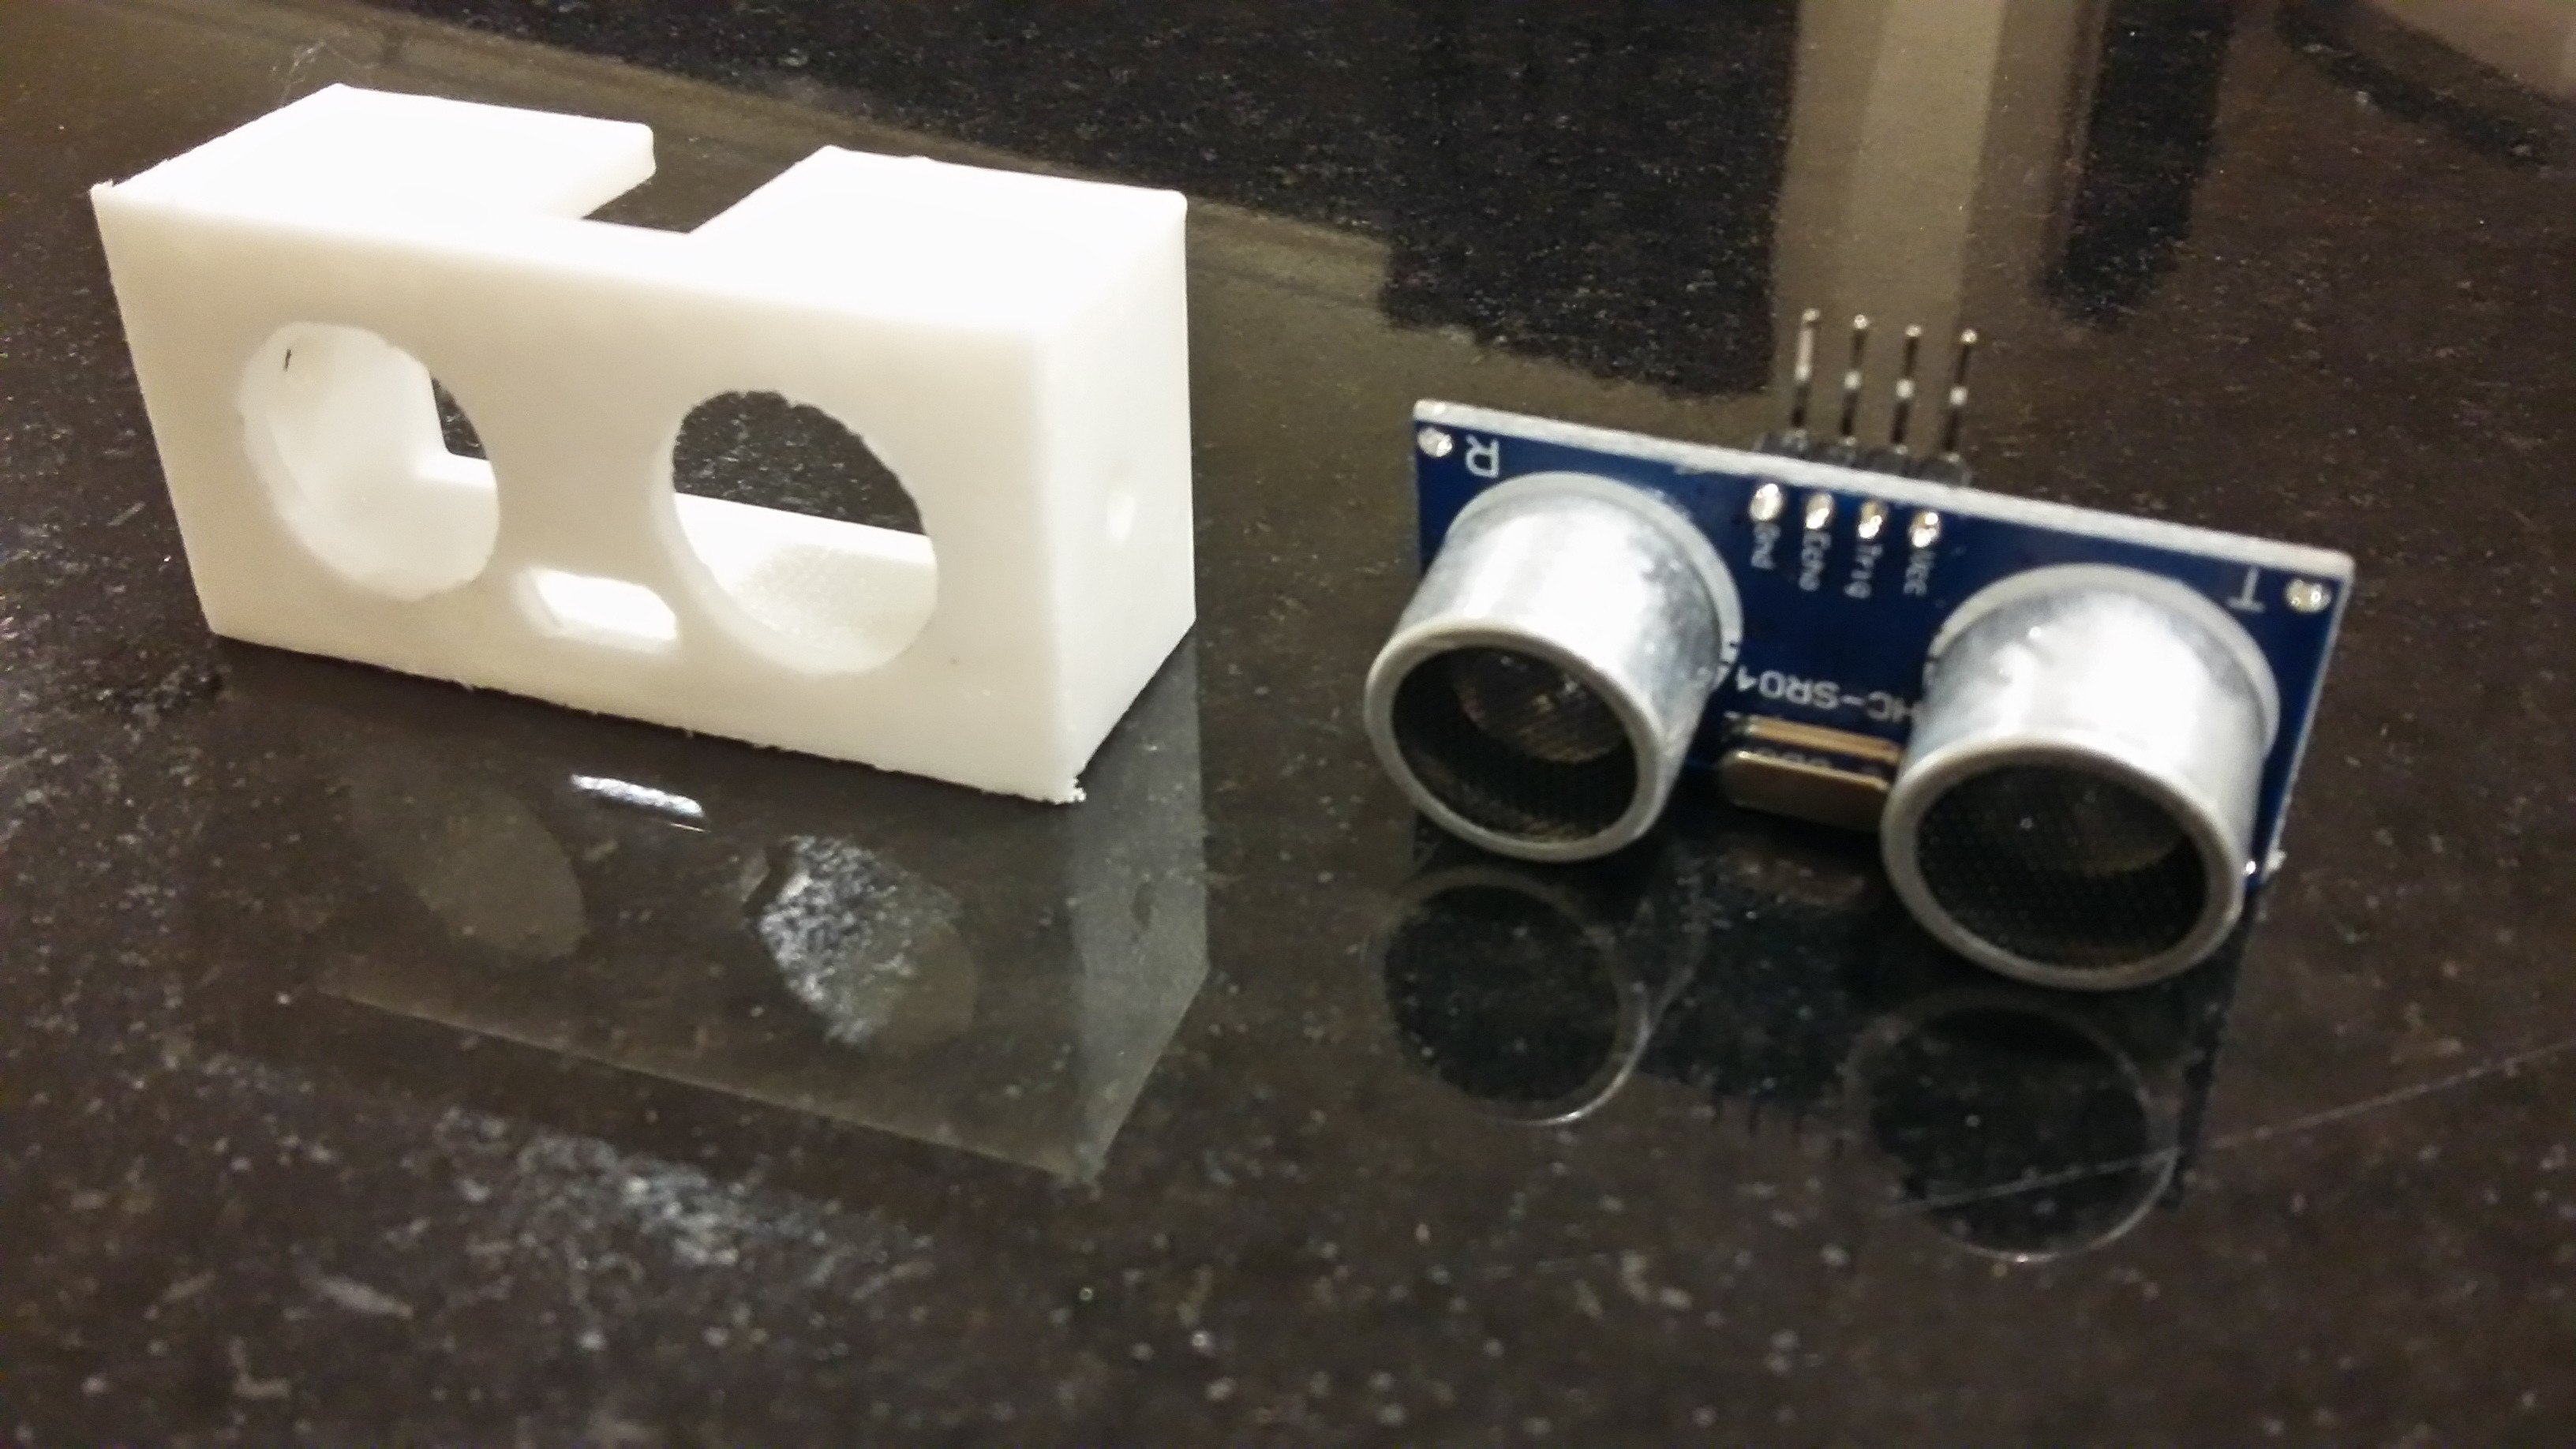
This is a small bracket designed in openscad and printed. It is not designed to be pretty, but functional.
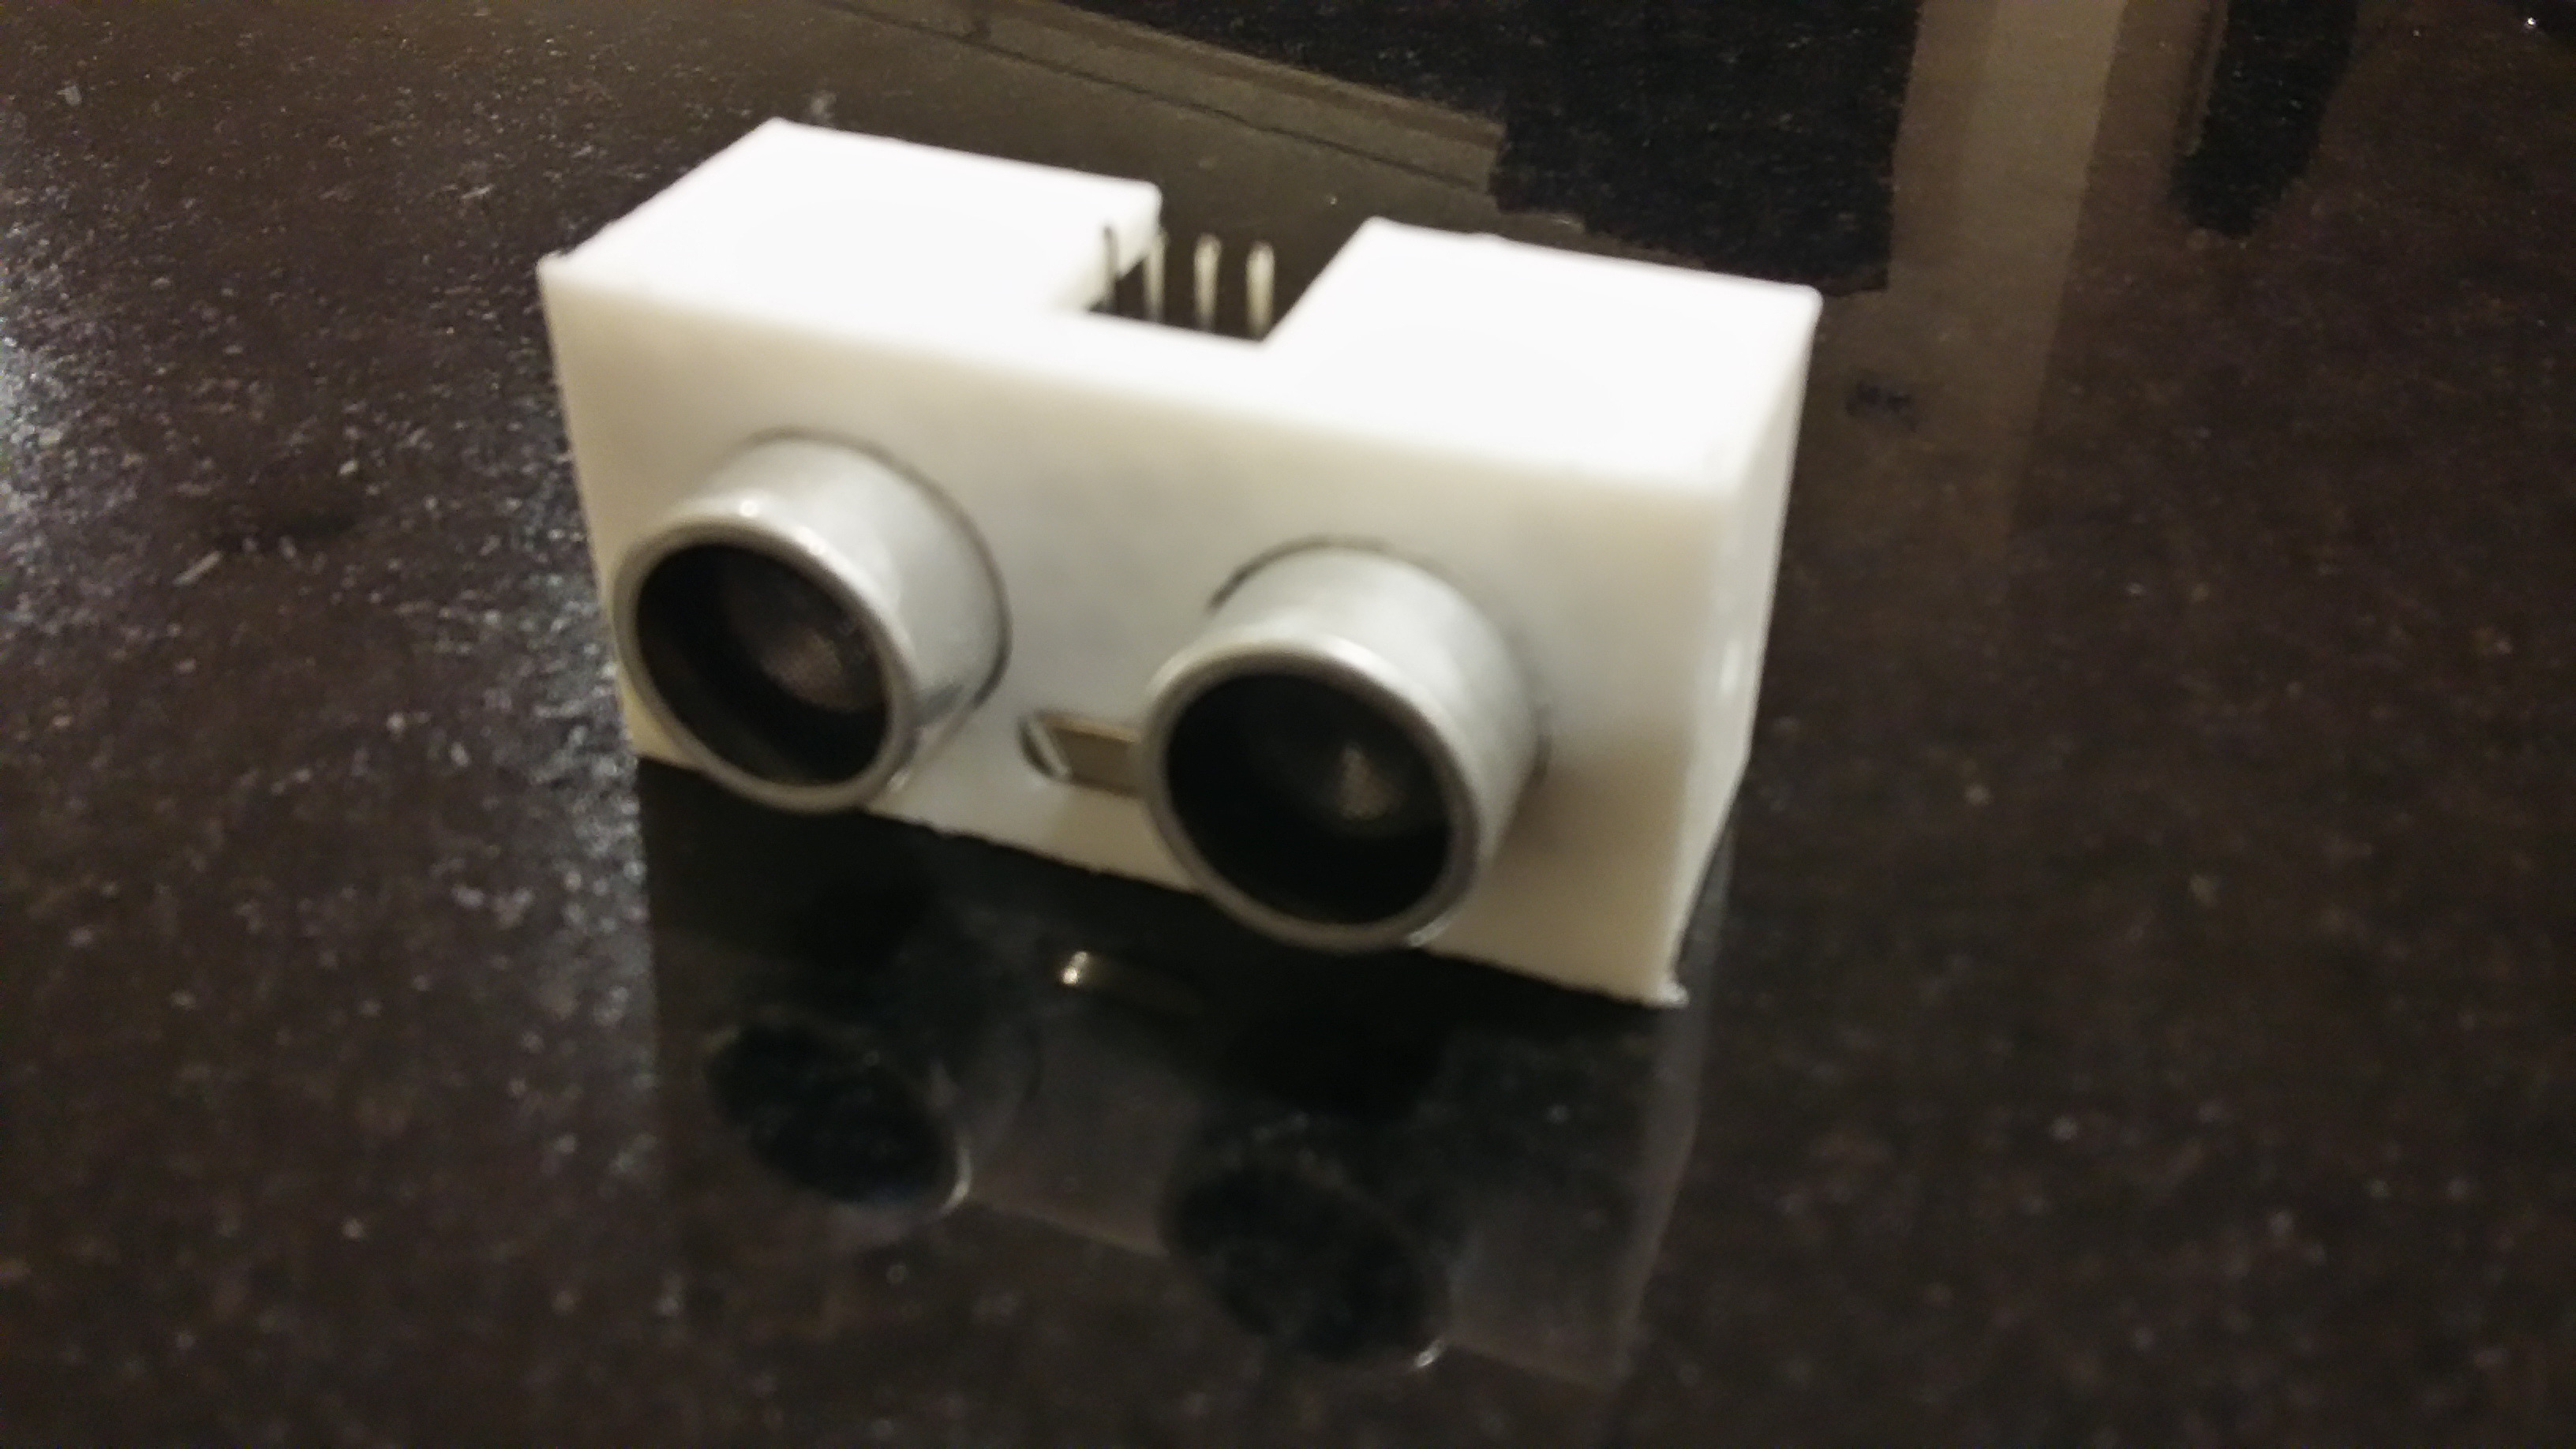
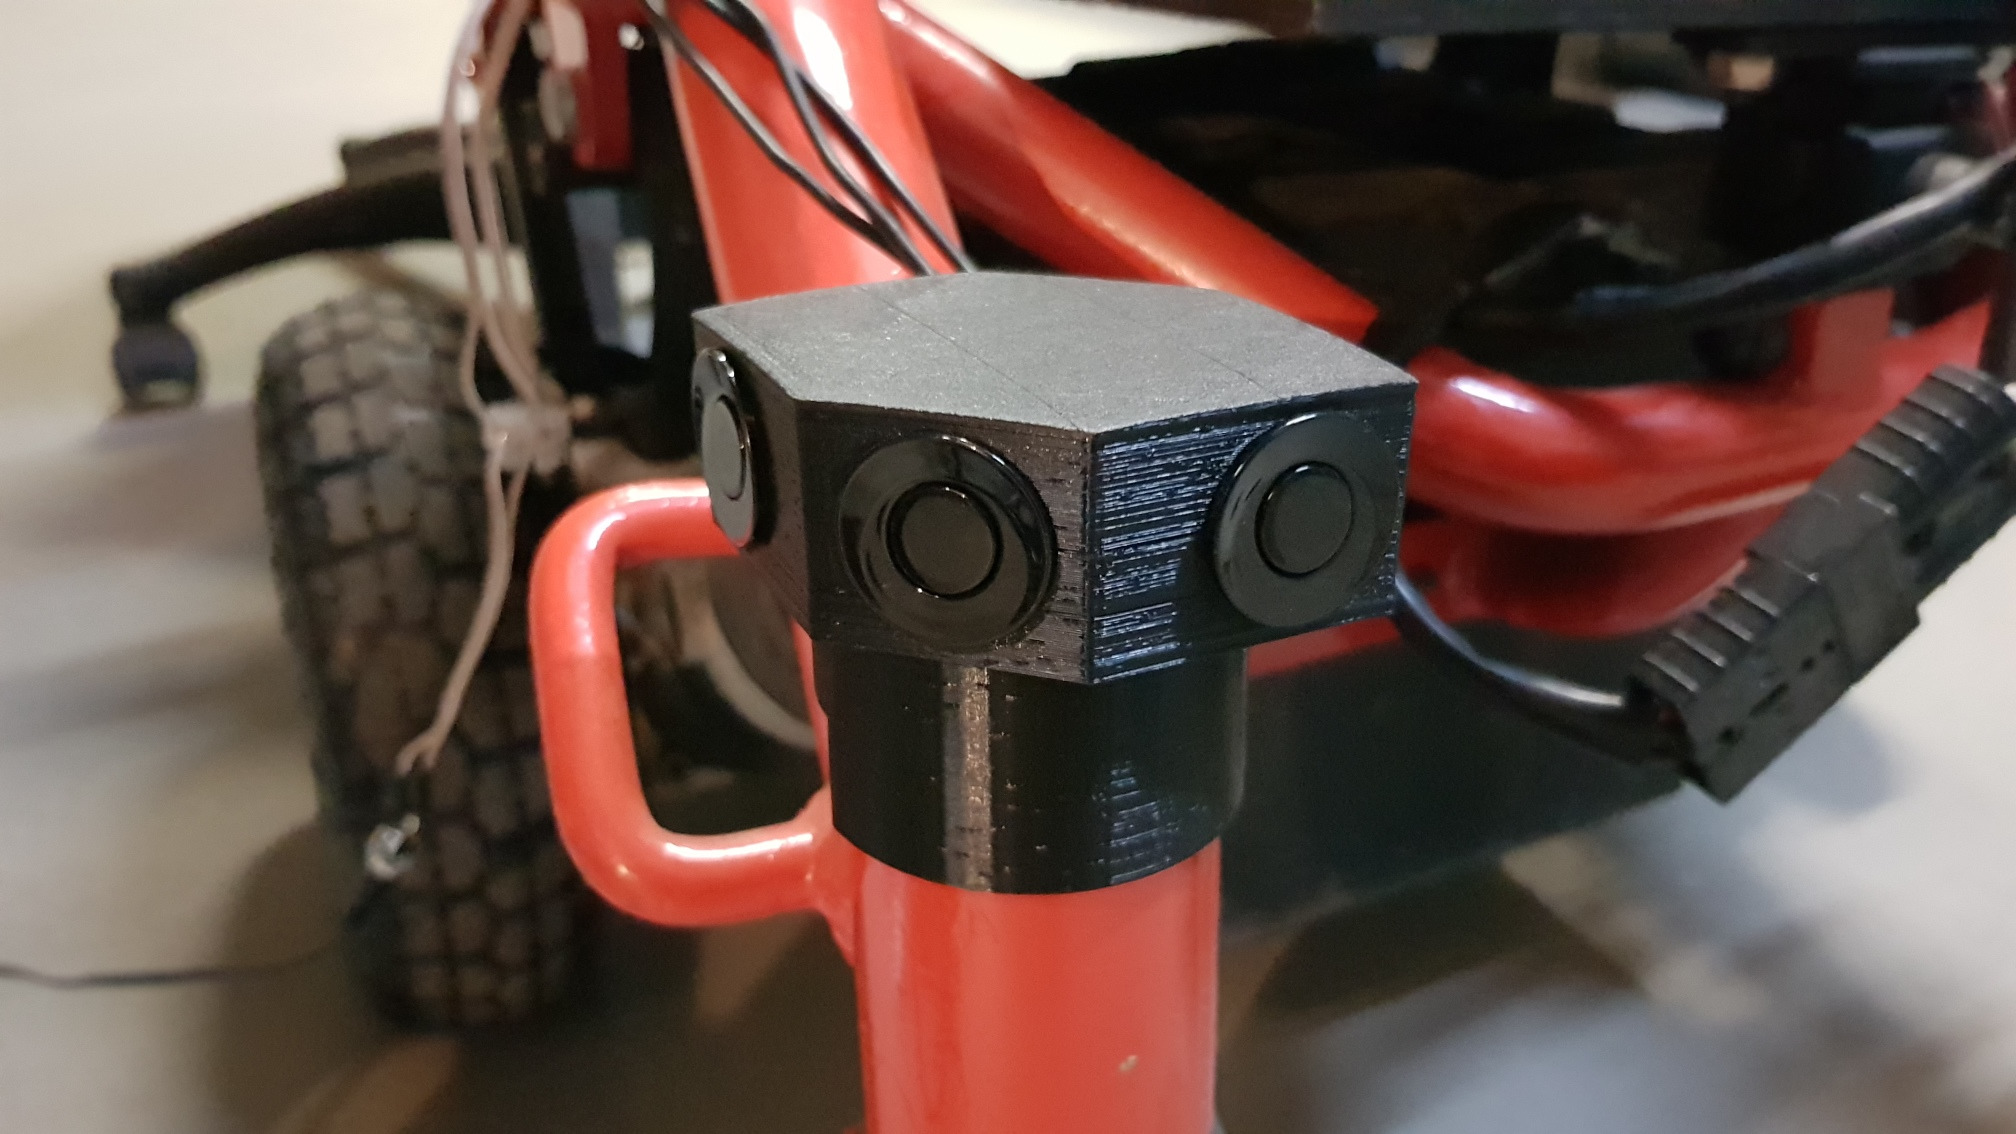
This is a cover / protector for a HC-SR05 ultrasonic distance detector .
It came out pretty well (once I realised I needed 0.5mm spacing around everything to actually make things fit), but it is actually far stronger (and heavier) than anyone would actually use on an indoor robot. (For out outdoor robot, it would be pretty good, but outdoor robots are probably better off with proper weatherproof parking sensors anyway).
Pulley
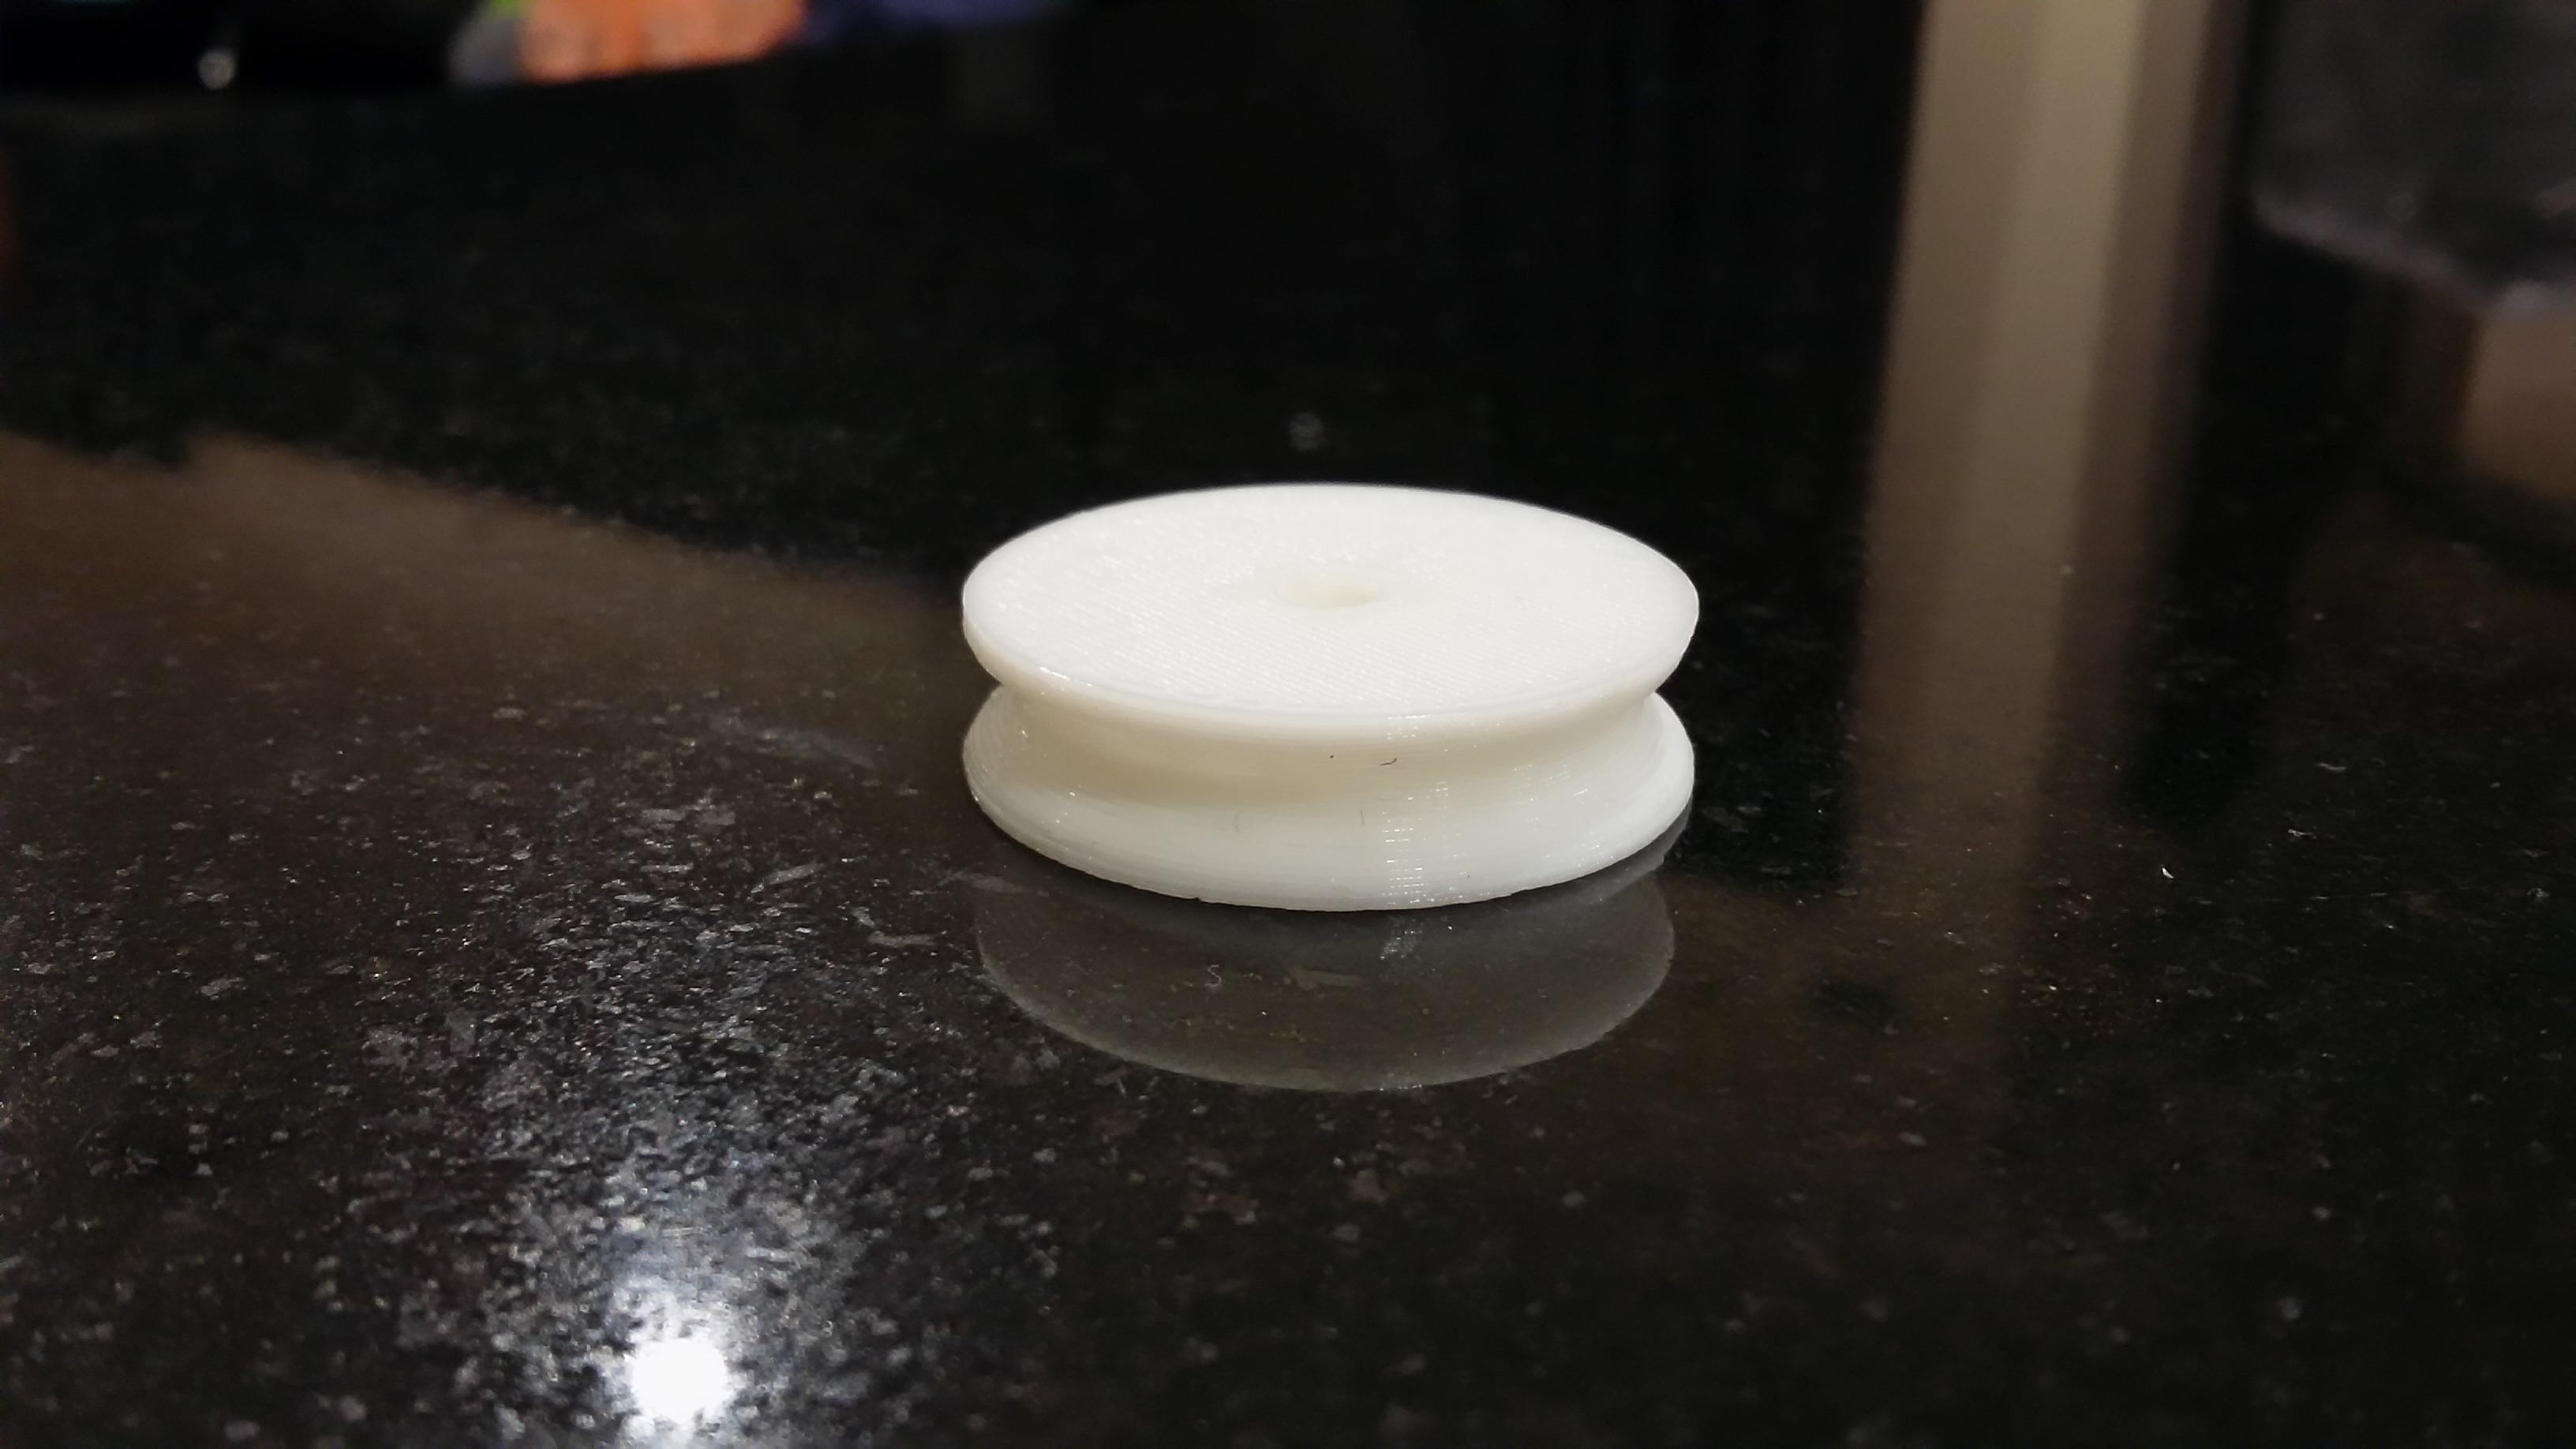
A pulley to be used in the collision detection for the MachisMow.
The centre hole will need to be drilled out to make it clean, but that's very simple.
Housebot revisited
After several attempts, this base was printed on its butt ...
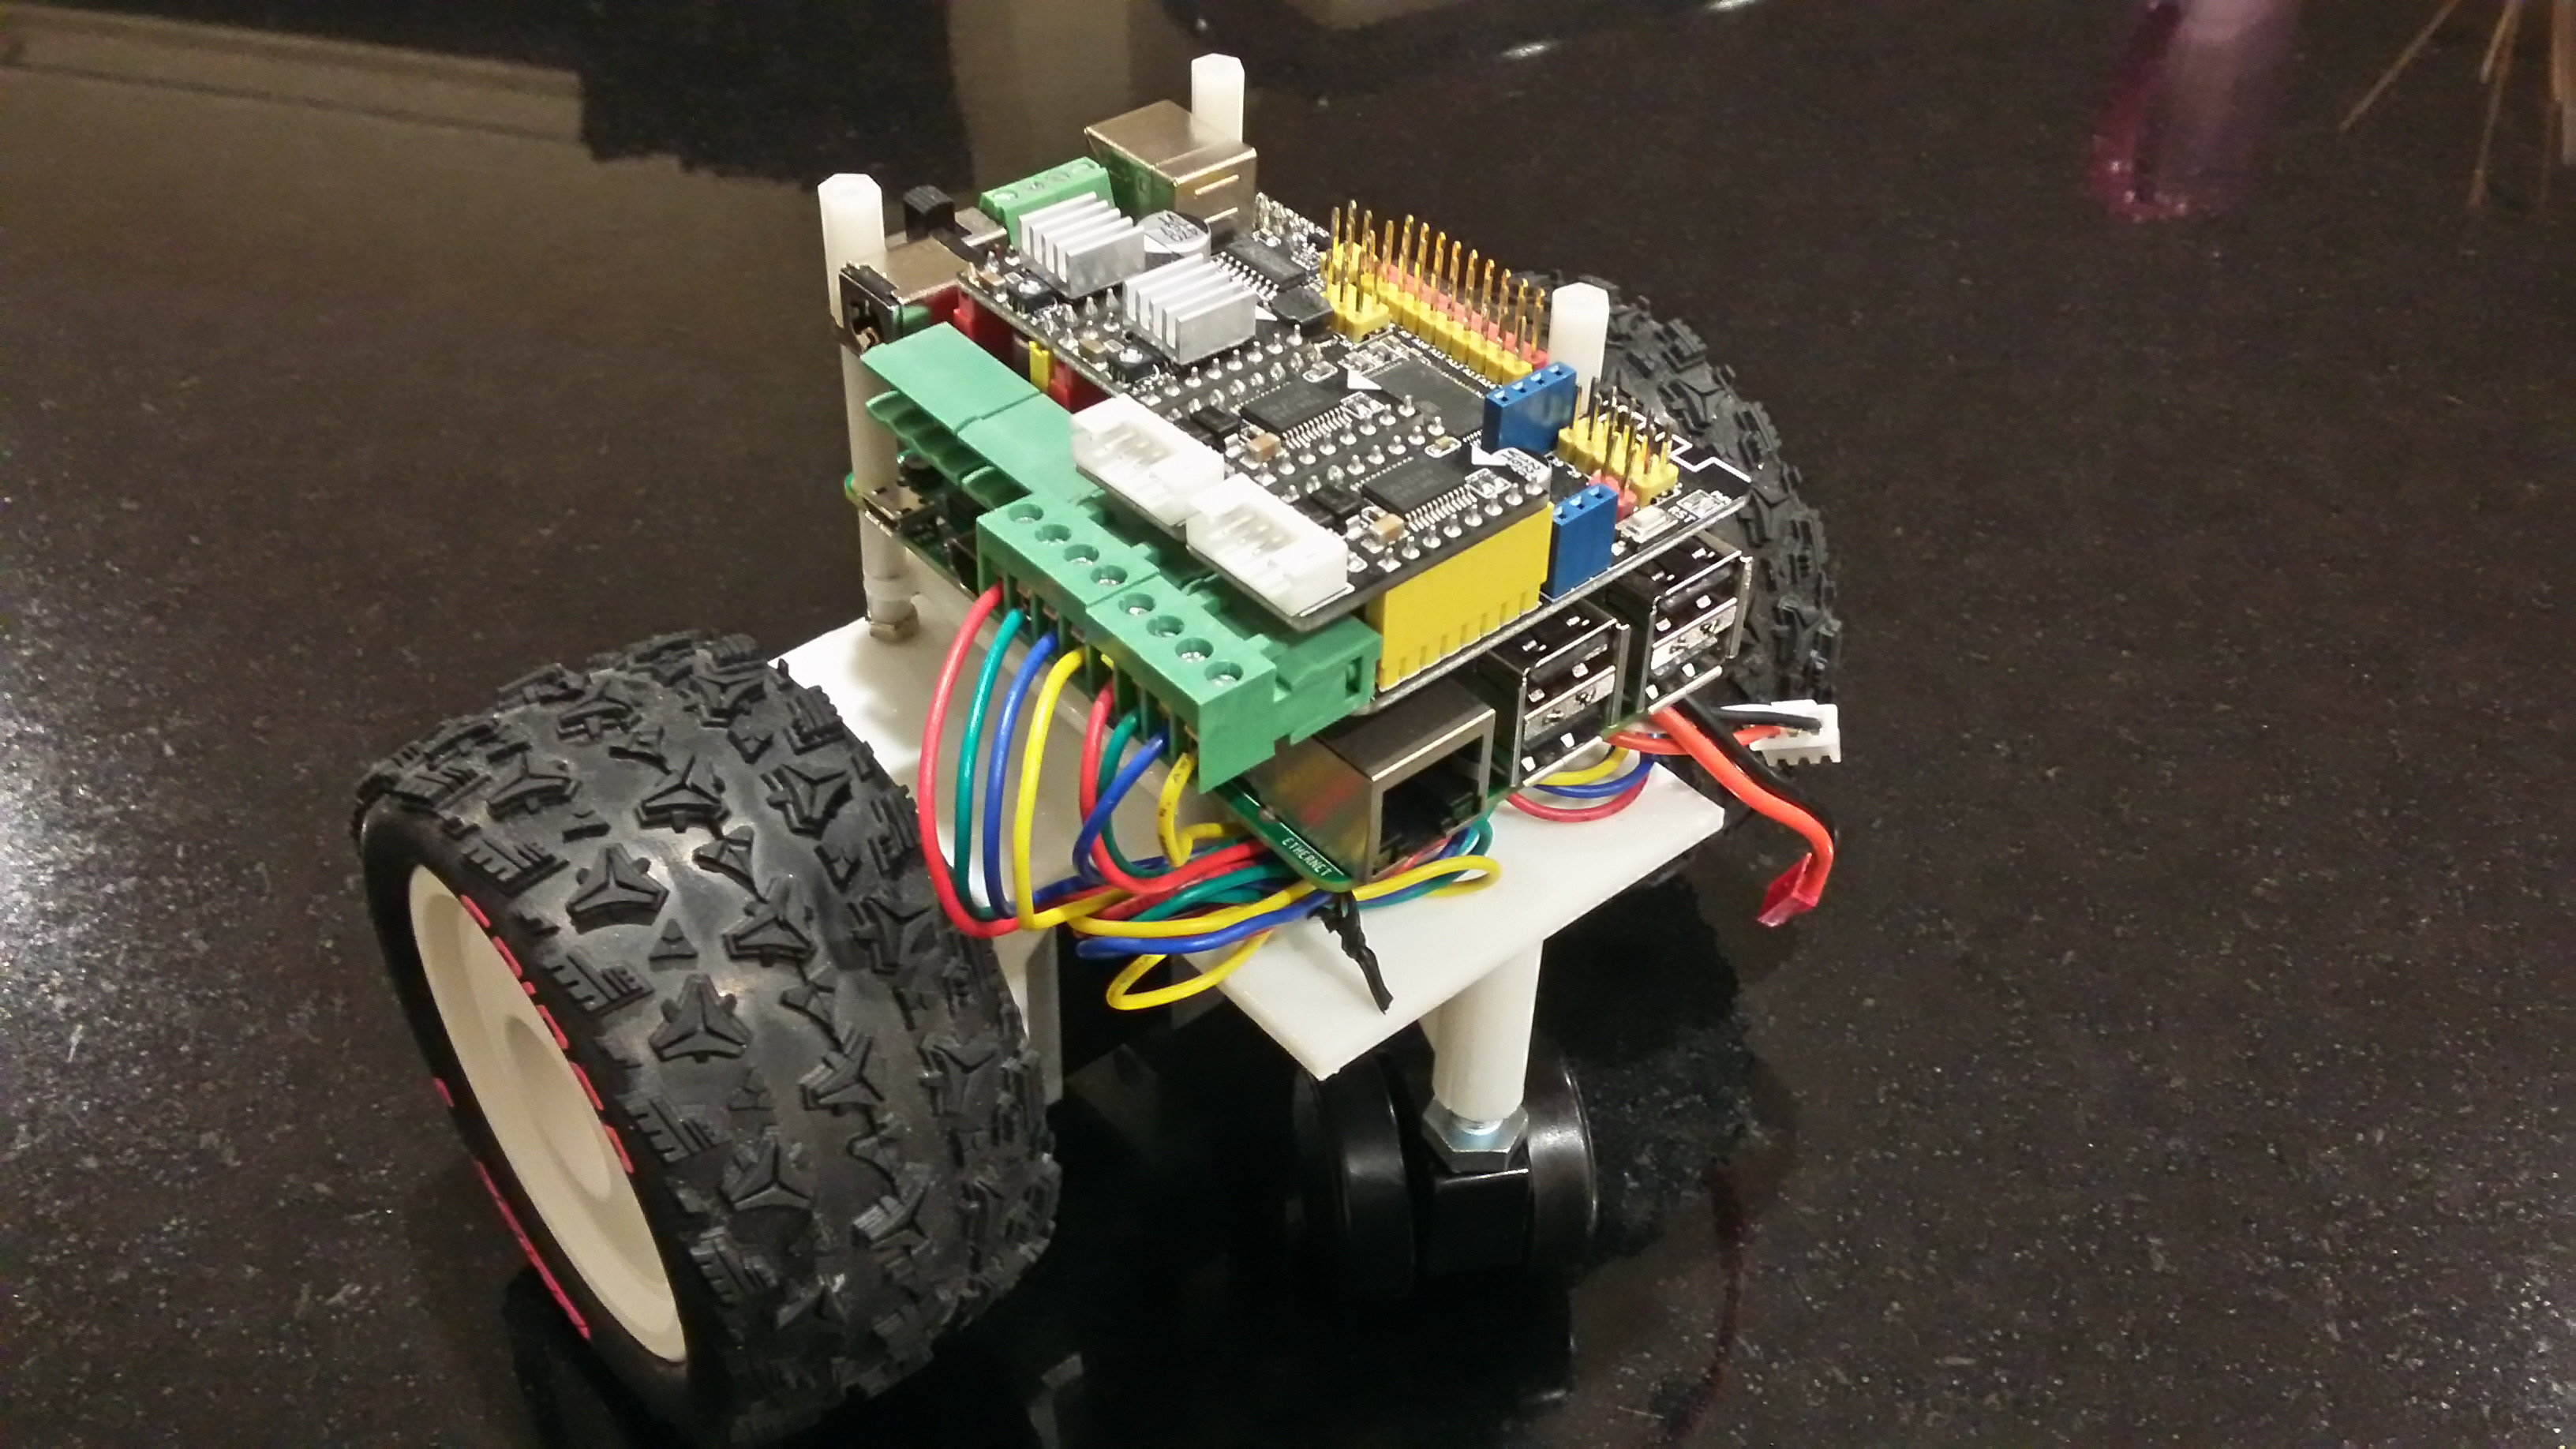 ...and the Raspberry Pi and MegaPi mounted on stand-offs.
 The battery has its own holder between the base and the Raspberry Pi.
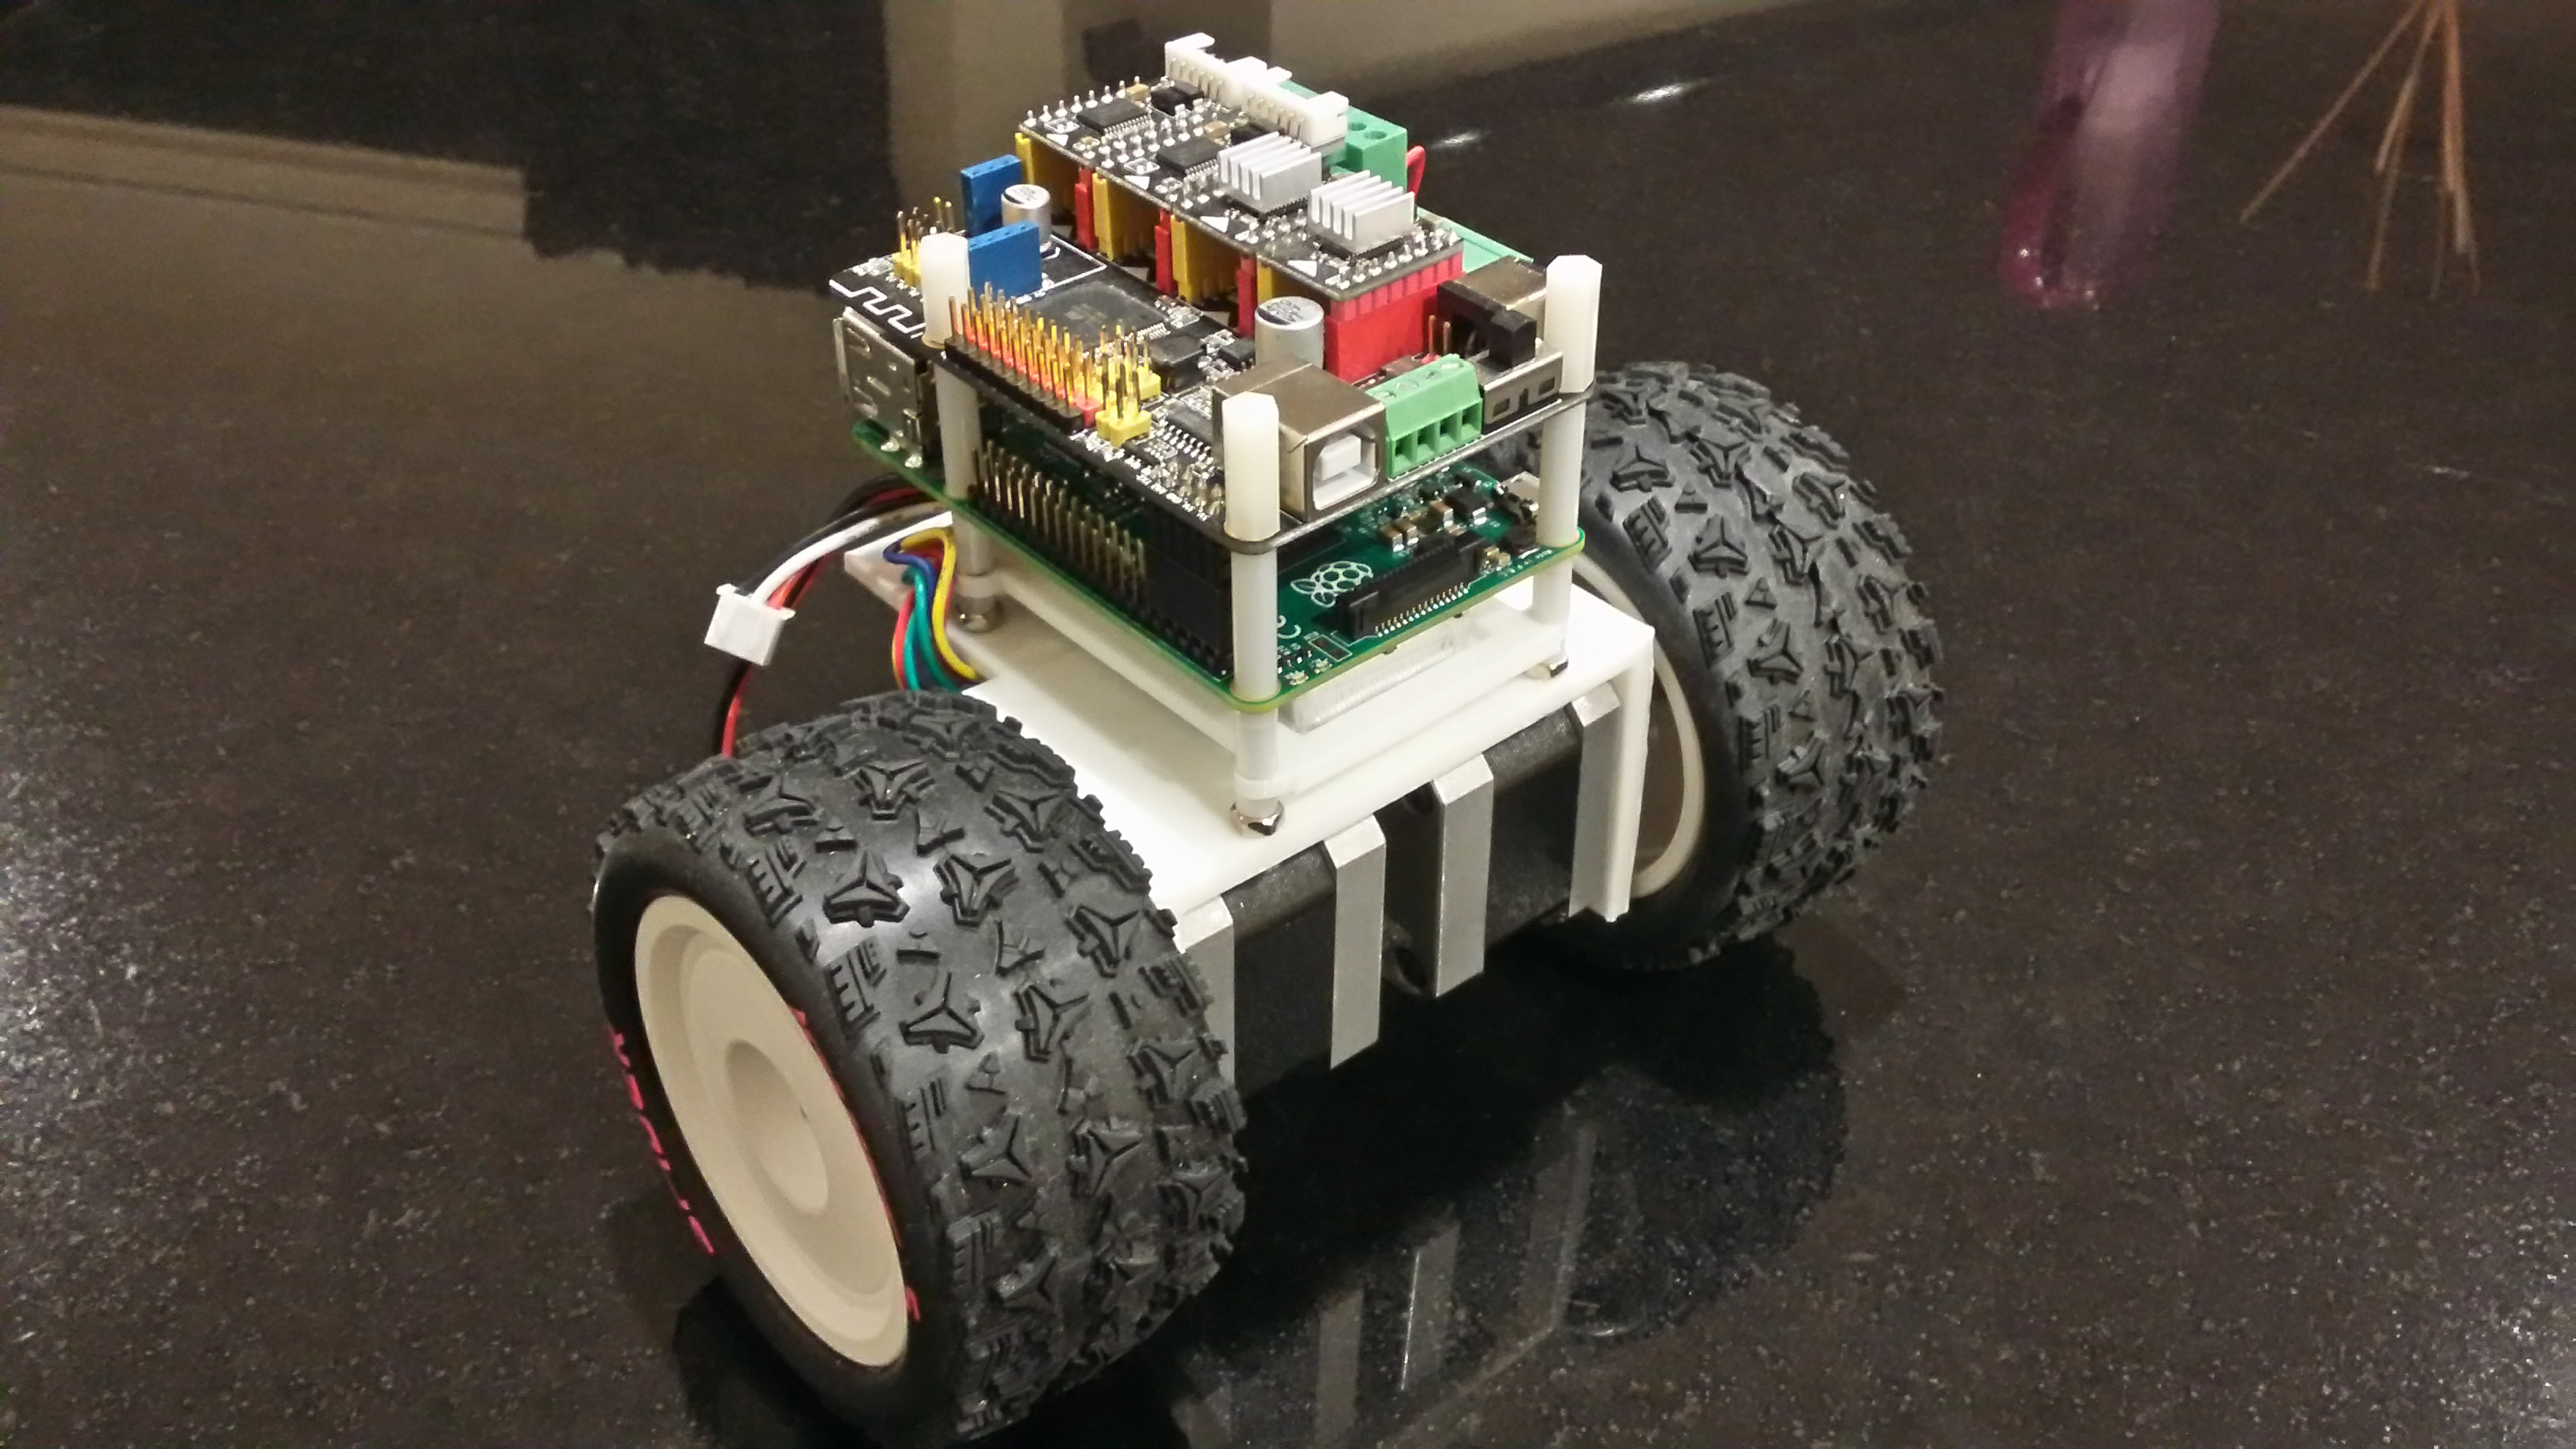
Another base can be printed and put onto the top of the MegaPi, for sensors (camera, lidar or whatever).
The future

-
Maybe a 3D printed drone - a bit of a challenge on a 90mm*90mm*900mm printer.
Leave a comment
 Something I'm doing wrong? Solved my problems? Got a better idea? Got a similar problem?
Think I might have solved your problem? Ninety-nine problems, but your robot ain't one? Say so ..